About: Redundancy mode allows you to configure two Schedule systems for disaster recovery. Both systems will be completely in sync. In case the primary system becomes unavailable the secondary system automatically takes over.
Redundancy behavior


Configure redundancy settings
To run a system in redundancy mode you have to configure both endpoints in this case the primary system and the secondary system to sync between each other.
To set up the redundancy:
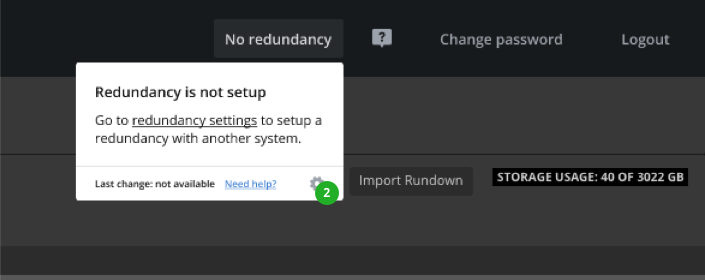
- Click on the redundancy status.
- In the opening overlay click on "Settings" or the link that says "redundancy settings".
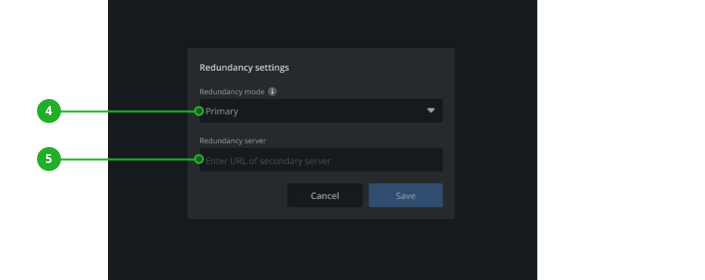
- Select the "Redundancy mode" for your system.

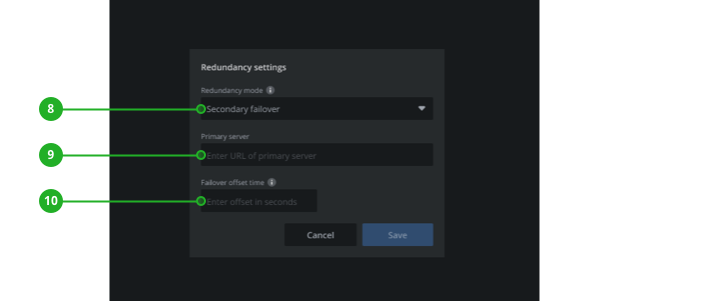
Redundancy Modes
Primary
On the primary system select "Primary" as redundancy mode (4)
and enter the "URL of the secondary system". (5)
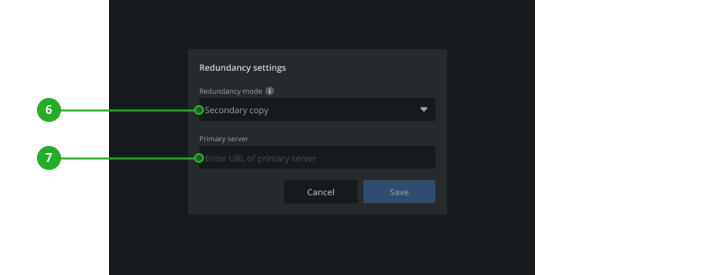
Secondary copy
On the secondary system select "Secondary copy" (6)
and enter the "URL of the primary system". (7)
Secondary failover
On the secondary system select "Secondary failover" (8)
and enter the "URL of the primary system". (9)
For the failover, you also need to enter the "Failover offset time" (10) after when the secondary system should become the primary in case the primary system becomes unavailable.
Using a secondary system
When a system runs in secondary mode, most of the interactions in the UI are disabled. The settings and the playlist can not be modified because everything is synced from the primary system.

Using the library and seeing element details in the inspector is still possible.
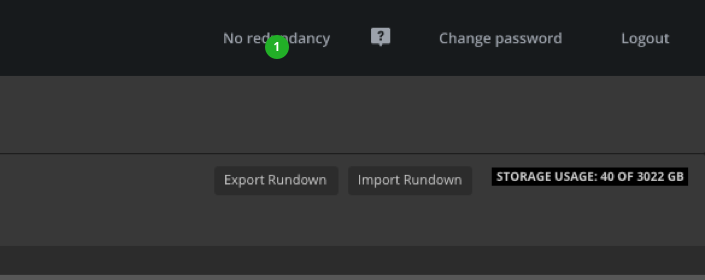
Identify the current redundancy status
The current redundancy status will be displayed in the top right corner.
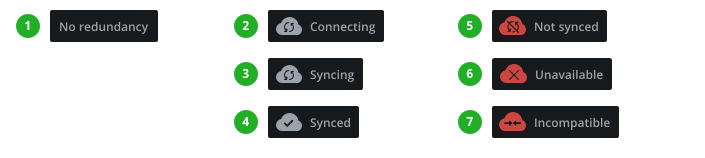
- No redundancy: No redundancy has been set up. This is the default status. To start from here see configure redundancy settings.
- Connecting: After the redundancy has been set up the two systems establish a connection and perform the first sync between each other.
- Syncing: Every time there is a change on the primary server the secondary server will catch up and display that it is syncing.
- Synced: The primary and secondary systems are completely synced.
- Not synced: Both systems are out of sync. You can manually force a sync by clicking on the sync status and pressing "Resync now" in appearing overlay.
- Unavailable: The system to sync with is not available. The reason for this could be that it is currently performing a server update or is having an issue. When this status remains prevalent you can switch the secondary system to primary by pressing the "Make primary" button in the details overlay that appears when clicking on the sync status.
- Incompatible: An incompatibility can occur for two reasons:
- The URL of the redundancy address links to a system with the same redundancy mode e.g. 'primary - primary' or 'secondary - secondary'. This can be resolved by changing the redundancy mode on one system.
- The redundancy address links to a system with a different version of Schedule. To fix this, update both systems to the same server version or contact LTN support.