
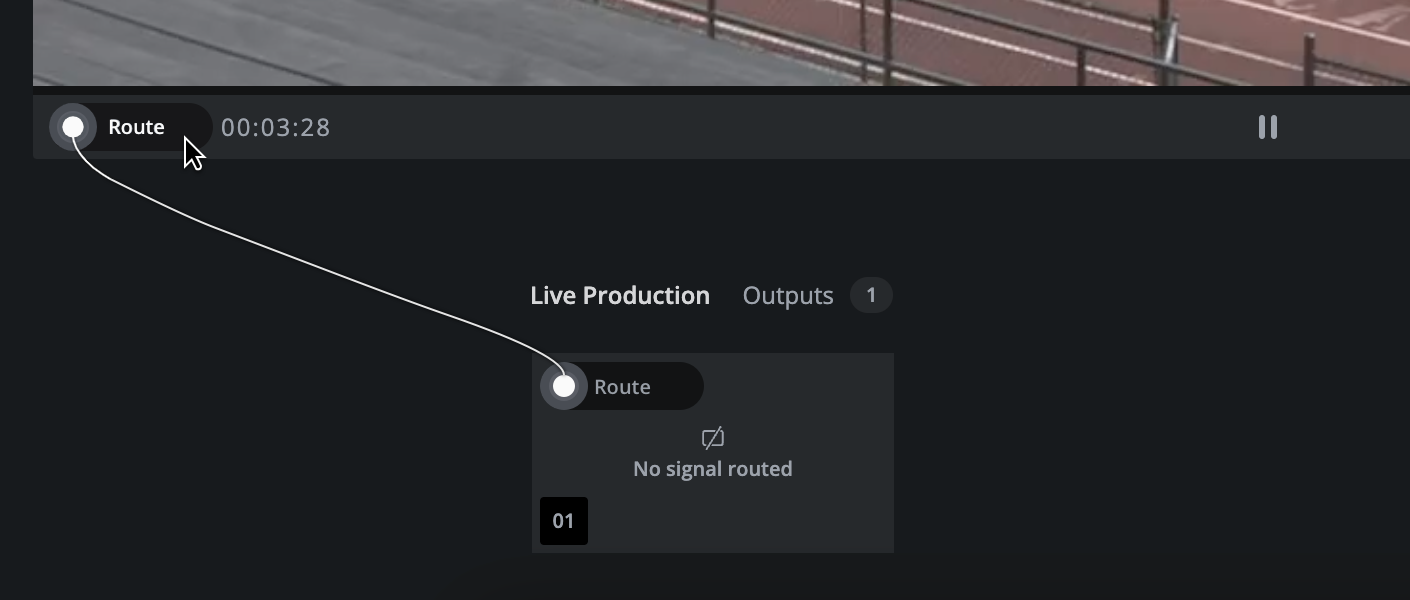
About: Routing live signals is simple, straight-forward, and flexible. While establishing a routing connection Live Video Cloud will display a line from the source to the target or vice versa.
Hint: You can route live signals by opening a live signal or using the production multiview.
→ Learn how to route live signals in productions.
→ Learn how to route live signals in productions.
Not sure how to start?
→ Learn how to configure productions.
→ Learn how to open live signals.
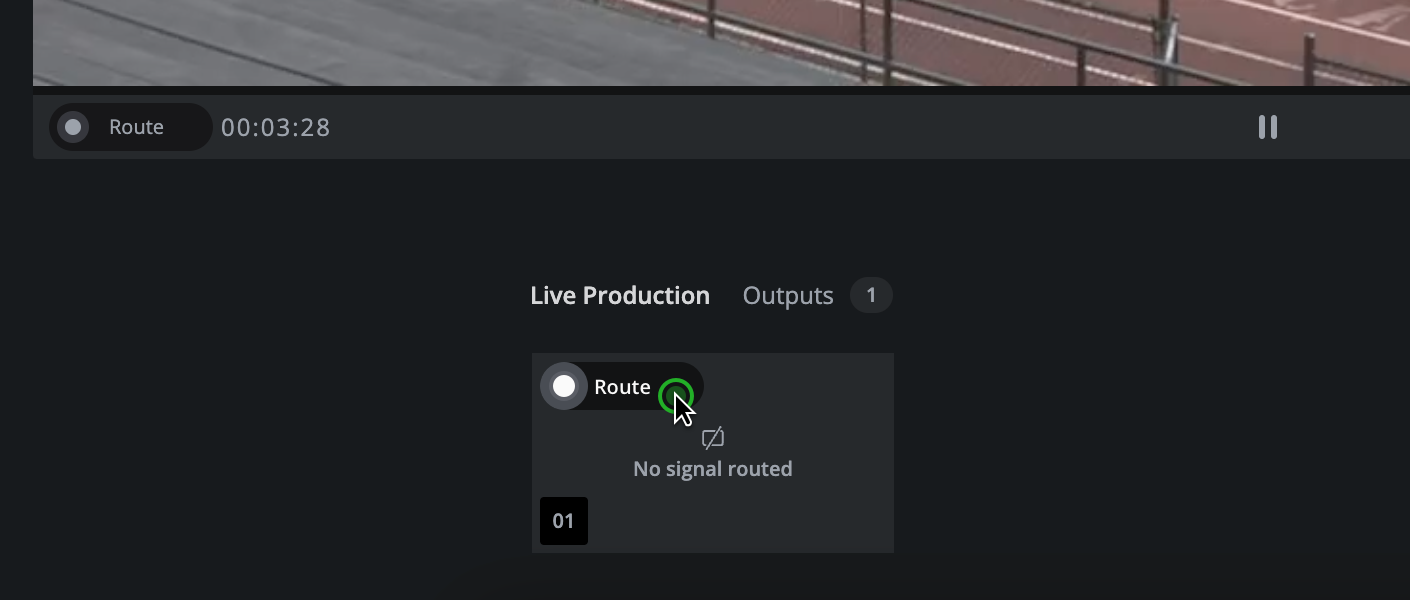
Route live signals
Before you start, open a live signal.
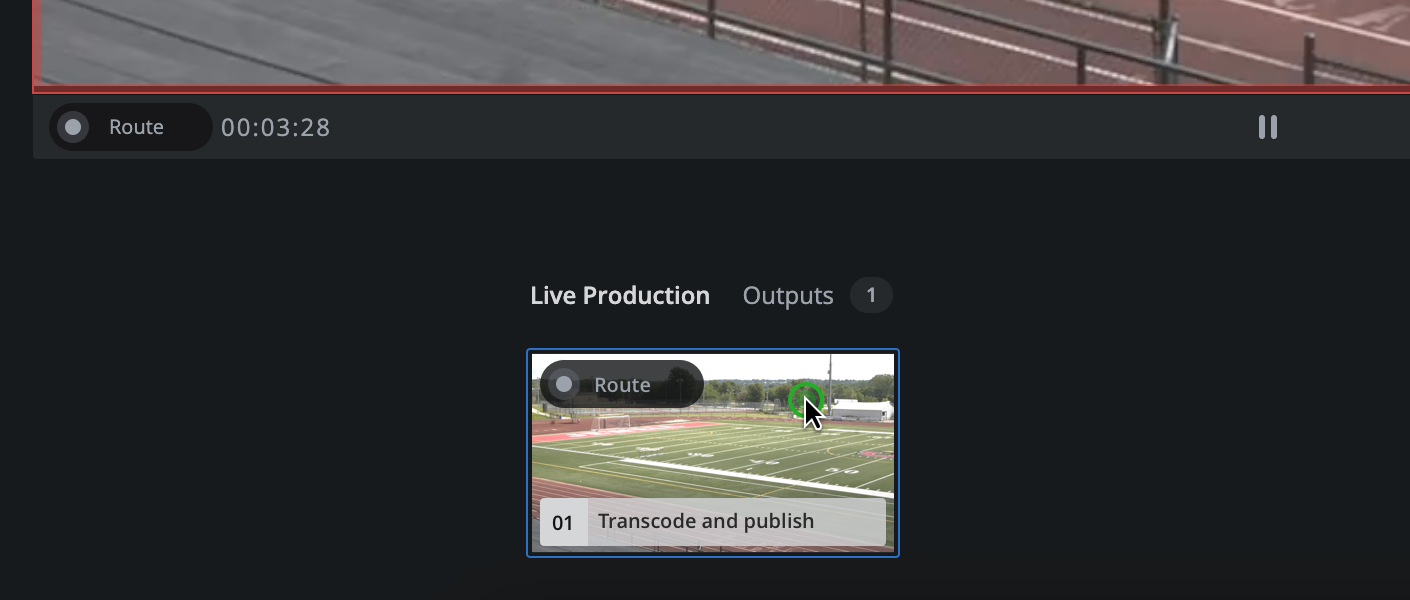
To create a routing starting from an input signal:
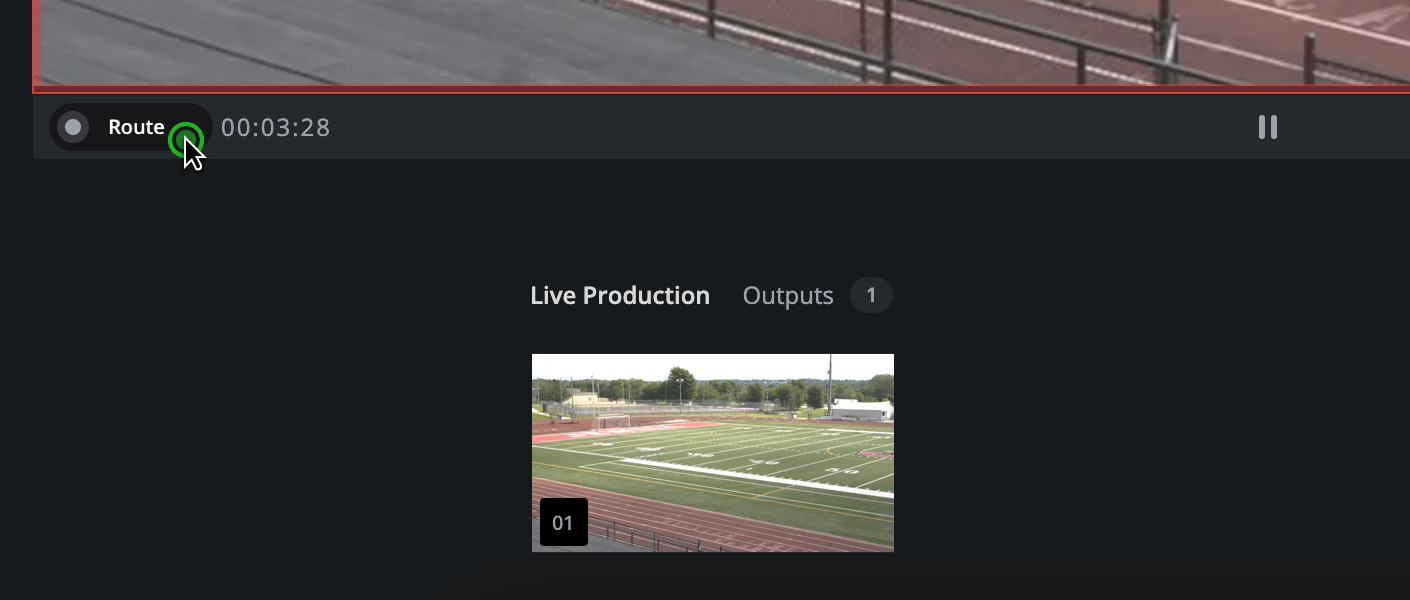
- Click on the "Route" button.
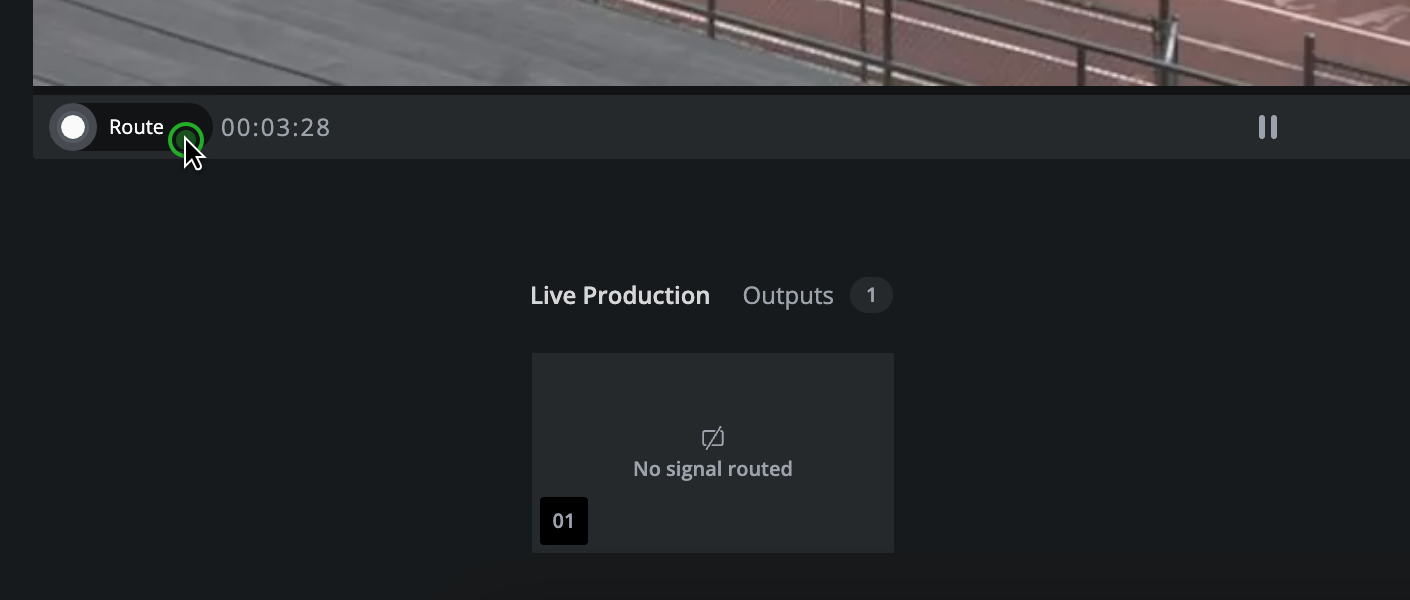
- Move your mouse on the target output.
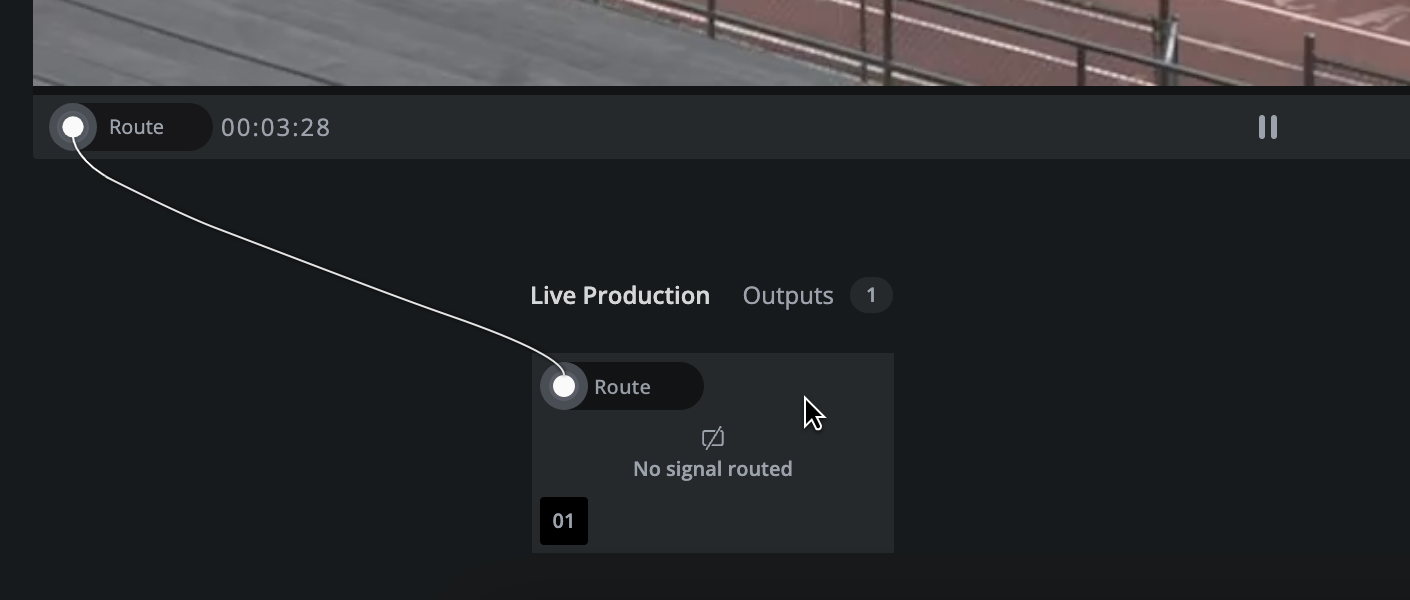
- Click anywhere on the target output.
Hint: Input signals can be routed to as many outputs as needed. Drawing a new routing connection does not override existing routings from an input signal perspective.
To create a routing starting from an output:
- Place your mouse on an output or select an output.
- Click on the "Route" button.
- Move your mouse on "Route" button of the input signal.
- Click "Route" on the input signal.
Hint: Outputs support one active routing. Whenever a new connection is drawn to an output, the existing connection is overwritten.
Instead of clicking twice, you can also draw a routing connection by dragging and dropping. Remember to always start from the "Route" button.
Hint: Live Video Cloud previews the correct signal on the output in real-time. Live Video Cloud does not route based on the exact timecode of the user's interaction. As a result, the actual routing of a signal is slightly delayed compared to the user's interaction and signal timecode.
Abort a routing action
To abort the creation of a routing:
- Click on the "Route" button.
- When the routing connection line shows, either press ESC on your keyboard or click anywhere except on a valid target.
How to continue?
→ Learn how to remove routings.
→ Learn how to monitor outputs.