
About: Opening a live signal allows you to preview, listen in, and route the signal.
Open a live signal
You can access a detailed view of a live signal anywhere you see that live signal.
Option A: Open from inputs
- Go to inputs.
- Make sure you are in tile view.
3.1 Select an SRT, RTMP, HLS, RTSP, or RTMP input in the list on the left
3.2 Double-click a live signal.
3.3 Or select a live signal and click open at the top right of the inspector.
Option B: Open from productions
- Go to productions.
2.1 Select a live signal and click open at the top right of the inspector.
2.2 Or select an input in the production inspector and click open at the top right of the flyout.
Option C: Open from outputs
- Go to outputs.
2.1 Select routed signal on stage and click open at the top right of the inspector.
2.2 Or select the routed signal in the output inspector and click open at the top right of the flyout.
Option D: Open from assets
- Go to assets.
- Make sure you are in list view.
3.1 Double-click an ongoing recording.
3.2 Or select an ongoing recording and click open at the top right of the inspector.
4. At the top, select route.
Video playback
Opening a live signal will activate the route mode, which shows a preview of the live signal with routing options underneath.
If the live signal has a recording it can be previewed via switching to the trim mode, where it can be transferred or downloaded.
The video playback is displayed above the player controls and will automatically resize to use the maximum available space.
→ Learn more about browser video playback quality.
Player controls
The player controls consist of video controls and a routing functionality.
- Preview info: Displays a label, e.g., "Preview" or "Original". Get more info on the video quality by placing your cursor on the label.
- Preview title: Displays the type of signal which is shown.
- (Optional: Only for inputs with failover enabled.) Signal indicator: Displays a “P” for Primary or an “S” for Secondary, which identifies the previewed signal.
- Route: Route the live signals to an available output.
→ Learn to route live signals in inputs. - Time counter: Displays the duration of the video.
- Play/Pause: Play or pause the video.
- (Optional: Only for inputs with failover enabled.) Switch Preview: The video preview can be switched between primary and secondary signal.
- Volume: Mute, unmute, and control the volume of the audio.
Outputs
Below the video playback Live Video Cloud displays all running outputs that are assigned to the productions the respective input is assigned to. Select an output to get further information.
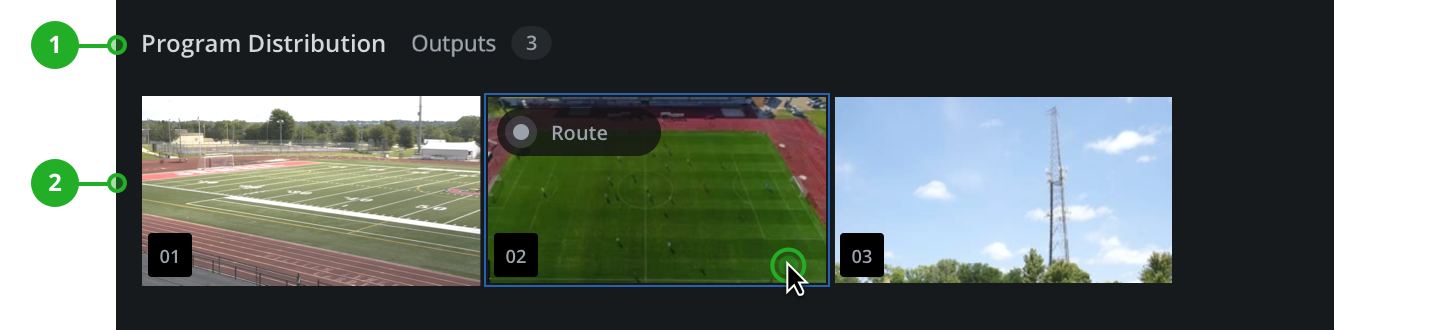
- Production: The production name is displayed and the number of outputs, which are assigned to this production.
- Outputs: Output previews are displayed, including the position number and the route button, when the mouse cursor is on top of them.
To select an output:
- Left-click on any displayed output.
- Explore the provided information in the inspector at the right.
To unselect an output:
- Left-click the selected output.
- The inspector now displays information related to the input signal.
How to continue?
→ Learn to inspect input and live signals.
→ Learn to route live signals in inputs.
→ Learn to transfer assets or segments.