About: Publish on Twitch via an OAuth-connected destination to automatically update metadata or trigger ad breaks on the destination platform.
Not sure how to start?
→ Learn to create destinations.
1. Create a Twitch destination
To create a Twitch destination, modify your destinations, add a new destination and follow the instructions below:
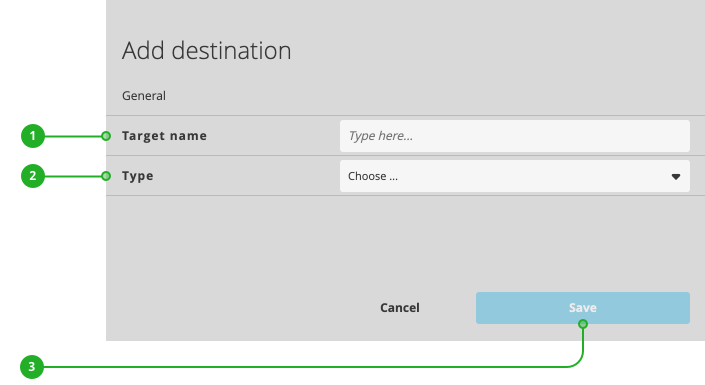
- Enter a name.
- As type, select "Twitch".
- Click "Save".
Continue your configuration in the new dialog appearing:
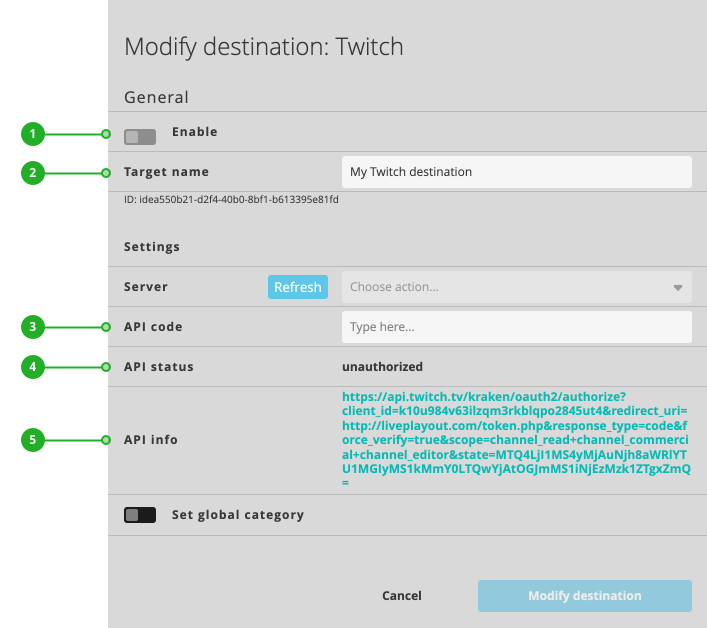
- Enable/Disable: Activates or deactivates the destination for publishing.
- Target name: As described above, the name of your destination.
- API code: Displays the authentication code once authentication is completed. You can also enter a valid API code from Twitch.
- API status: Displays the current authentication status.
- API info: Provides a link to initiate the authentication or provides detailed information on the current status of the authentication.
Continue with authenticating your destination.
2. Authenticate your destination
To authenticate your Twitch destination:
- Click the link next to the "API info" (5).
- Follow the instructions given by Twitch's authentication process. When asked, allow access to your Twitch account.
- Receive a success message: "Your token has been successfully transmitted."
- You can close the window displaying the success message.
Continue with completing your configuration.
Complete your configuration
The ingest server represents the specific ingest location and destination your LTN Schedule should publish to. We recommend to select an ingest server close to your LTN Schedule instance location.
To set an ingest server:

- Server: Select a Twitch ingest server to use.
Set a global category to help YouTube users find your content.
To set a global category:

- Enable "Set global category".
- Search for a category and select it.
Press "Modify destination" to save your changes. Your destination is now ready to use.
How to continue?
→ Learn to activate/deactivate your rundown.
→ Learn to turn on/off destinations.